Change Your Windows 10 Lock Screen Background
- glen8737
- Mar 24, 2021
- 1 min read
When you power on your computer you will most likely see the Windows 10 lock screen backgrounds provided by Microsoft. You can choose your own custom background from your images or even set up a custom slideshow from a group of images.
Here’s how to set it up.


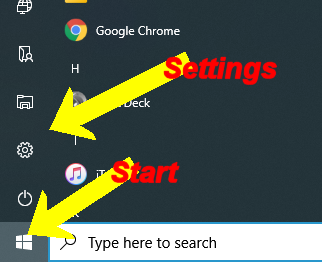
Click Start then Settings

Select Personalization
On the Personalization screen select Lock screen from the sidebar

In Lock screen settings, locate the drop-down menu labeled “Background,” which is just below the lock screen preview image. Click the menu, and you’ll see three options. Here’s what they do.
Windows spotlight: Shows an image provided by Microsoft through the Internet. You’ll see a new image every day.
Picture: Select your own background image for the lock screen.
Slideshow: Provide your own folder of images to use as a slideshow on the lock screen.

The default option is “Windows Spotlight,” which pulls new Microsoft provided images from the Internet. If you’d like to use your own image, select “Picture” from the menu, then click “Browse” to select an image you’d like to use.

If you’d rather have a custom slideshow of images, select “Slideshow” from the drop-down menu. Next, choose an album of photos to use as the source of images. Windows will cycle through them on the lock screen, changing them every few seconds. You can pick your “Pictures” folder or click “Add a folder” to add a custom group of images to use.

When “Slideshow” is selected, you can also change slideshow options by clicking “Advanced slideshow settings” just below the “Choose albums” area. Once you choose, it, you can change options such as Only use pictures that fit my screen.


댓글